Invoking the screen
To go to the screen click Requisition & RFQ on the main menu and select the Requisition – Insert New Line Items – Select option.
Main Menu > Requisition & RFQ > Requisition – Insert New Line Items
Screen Layout
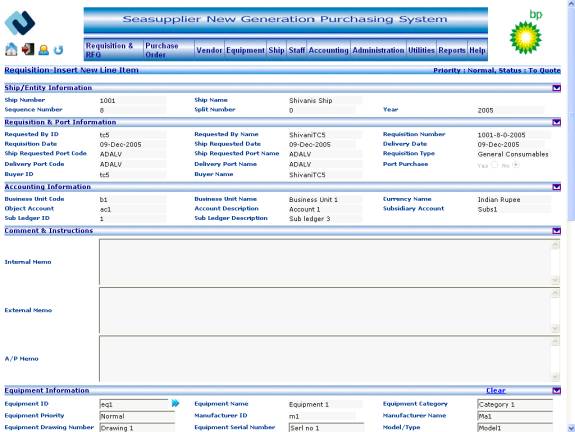
Figure Insert New Line Items 01
Figure Insert New Line Items 02
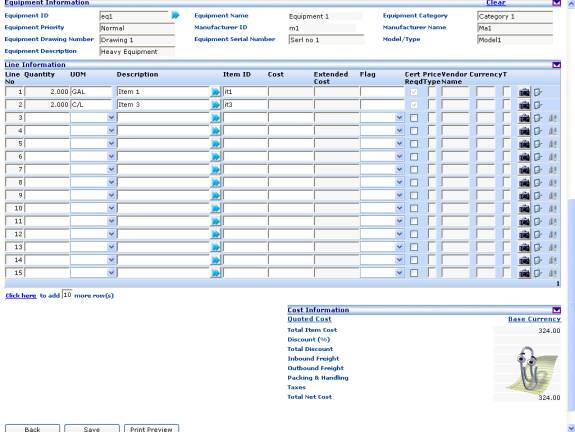
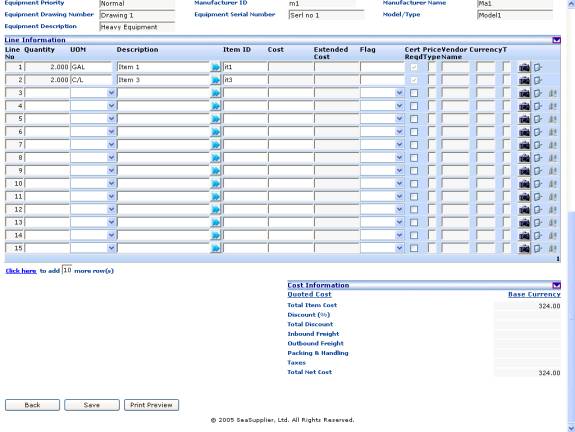
Figure Insert New Line Items 03
Note: All the fields will be pre-populated with the data already enteredin the system.for the selected requisition
The following fields will be displayed at the top of the screen
Priority label
This indicates the priority of the requisition.
Requisition Status label
This indicates the status of the requisition.
View the following fields in the Ship/Entity Information section
Ship Number label
This indicates the ship number raising the requisition.
Ship Name label
This indicates the ship name raising the requisition.
Sequence Number label
This indicates the sequence number for the selected ship.
Split Number label
This indicates the split number of the selected requisition.
Year label
This indicates the year of the requisition.
View the following fields in the Requisition & Port Information section
Requested By ID label
This indicates the user id of the user raising the requisition.
Requested By Name label
This indicates the user name of the user raising the requisition.
Requisition Number label
This indicates the requisition number. This is combination of the ship number; requisition sequence number, requisition split number and requisition year.
Requisition Date label
This indicates the date the requisition is raised
Ship Requested Date label
This indicates ship requested date.
Delivery Date label
This indicates requisition delivery date.
Ship Requested Port Code label
This indicates the ship requested port code for the requisition.
Ship Requested Port Name label
This indicates the ship requested port name for the requisition.
Requisition Type label
This indicates the requisition type for the requisition.
Delivery Port Code label
This indicates the port code where deliveries of items need to take place for the requisition.
Delivery Port Name label
This indicates the name of the delivery port for the requisition.
Port Purchase radio button
This radio button indicates requisition pertains to a port purchase or not.
Buyer ID label
This indicates the buyer id.
Buyer Name label
This indicates the buyer name.
View the following fields in the Accounting Information section
Business Unit Code label
This indicates the business unit code of the requisition.
Business Unit Name label
This indicates the business unit name of the requisition.
Currency Name label
This is base currency of the company.
Object Account Code label
This indicates the object account code for the selected business unit
Account Description label
This indicates the object account description.
Subsidiary Account label
This indicates the subsidiary account code.
Sub Ledger ID label
This indicates the sub ledger id for the selected object account.
Sub Ledger Description label
This indicates the sub ledger name.
View the following fields in the Comments and Instructions section
Internal Memo textarea
This indicates the internal memo text. This is read only field.
External Memo textarea
This indicates the external memo text. This is read only field
A/P Memo textarea
This indicates the A/P memo text. This is read only field.
View and edit the following fields in the Equipment Information section
Note: If equipment is selected from the equipment master, then you will find all textboxes under this section in Read-only mode.
Equipment ID textbox
This indicates the equipment id of equipment requisitioned. Click the button to the right of the textbox to access the Search Equipment popup from where you can select the relevant id.
Equipment Name textbox
This indicates the equipment name of the equipment requisitioned. The Equipment Name textbox gets populated with the corresponding name when the user selects an equipment id in the earlier step.
Equipment Category textbox
This indicates the equipment category. This is editable for manual entry equipment.
Equipment Priority textbox
This indicates the equipment priority. This is editable for manual entry equipment.
Manufacturer ID textbox
This indicates the manufacturer id.
Manufacturer Name textbox
This indicates the manufacturer name. This is editable for manual entry equipment.
Equipment Drawing Number textbox
This indicates the equipment drawing number. This is editable for manual entry equipment.
Equipment Serial Number textbox
This indicates the equipment serial number. This is editable for manual entry equipment.
Model/Type textbox
This indicates the equipment model or type. This is editable for manual entry equipment.
Equipment Description textbox
This indicates the equipment description. This is editable for manual entry equipment.
To clear the Equipment Information Section
Click the Clear link to clear all the text box values in the equipment information section. You can then re-enter new equipment information in this section.
View and enter the following fields in the Line Information section
Note: You can enter information pertaining to new line items only. Line items already present in the requisition are non editable.
Line No label
This indicates the Line number in the grid. This is a read only field.
Quantity textbox
This indicates the quantity requisitioned. Maximum length allowed for the field is 11(7 digits before decimal and 3 digits after decimal).
UOM dropdown
This indicates the unit of measure for the selected item.
Description textbox
This indicates the description pertaining to the line item. Click the button below the textbox to access the search item popup from where you can select the relevant item. The pop up displays all the active items belonging to the equipment selected in the earlier step. Maximum length allowed for the field is 60.
Item ID label
This indicates the item id of the item in the line item. The textbox gets populated with the corresponding id when the user selects an item description in the earlier step. This is a read only field.
Cost textbox
This indicates the cost of the requisitioned line item. Maximum length allowed for the field is 15(12 digits before decimal and 2 digits after decimal).
Extended Cost textbox
This indicates the extended cost of the requisitioned line item. It is a read only field and contains the value for Quantity * Unit Cost.
Flag dropdown
This indicates the flag of the requisitioned line item whether ‘Safety’, ‘Hazardous’ or ‘Perishable’.
Cert. Reqd checkbox
This checkbox allows you to indicate whether certificate is required or not.
Price Type textbox
This indicates the price type of the requisitioned line item. By default it should be blank, Possible values are ‘M’/’C’ (‘Manual’/’Contracted’). This is a read only field.
Vendor Name textbox
This is contract vendor name. This is a read only field.
Currency textbox
This is the currency code corresponding to the price entered in the line item. This is a read only field.
T textbox
If approver comments, ship comments, buyer line comments, line item comments has values, it should be ‘T’ else blank value should be shown in the grid. This is a read only field.
To view the image of an item
Click the Image button to view an image of the item. If available, it opens the image in a popup
To view the details of an item
Click Details button to view details of the line item on the line item detail page.
To delete a line item
Click Delete button to delete the line item. This option is available for the newly inserted items only.
To add more rows to the grid
Click the Click here link to add more rows to the grid. You can specify the number of rows you wish to add by changing the number in the No of Rows textbox. By default it is set at 10 rows. You can add maximum of 99 rows at one go.
View the following fields in the Cost Information section
Note: For requisition whose status is Responded or Disapproved the totaling information is displayed in local i.e. vendor as well as base i.e. company currency.
Total Item Cost label
This field indicates the summary values of the line item grids extended cost in the base currency. The value of this field is updated based on the addition of new line items.
Discount (%)label
This indicates the discount in percentage points.
Total Discount label
This indicates the total discount.
Inbound Freight label
This indicates the inbound freight cost.
Outbound Freight label
This indicates the outbound freight cost.
Packing & Handling label
This indicates the packing and handling cost.
Taxes label
This indicates the taxes.
Total Net Cost label
This indicates the total cost calculated on the basis of information provided in the above fields in this section. It is the sum total of Total Item Cost, Inbound Freight, Outbound Freight, Packing/Handling, Taxes minus the Total Discount. The value of this field is updated based on the addition of new line items.
To save requisition
Click the Save button on the left hand bottom corner of the screen to save the newly entered line items for the requisition
To go to search screen
Click the Back button to go to the Search Requisition screen. The system will return you to the Search Requisition.
Requisition Insert Line Items - Line Item Details screen
Invoking the screen
To go to the screen click Requisition & RFQ on the main menu and select the Requisition Insert New Line Items – Line Item Details option
Main Menu > Requisition & RFQ > Requisition Insert New Line Items - Line Item Details
Screen Layout
Figure Insert New Line Items – Line Item Details 01
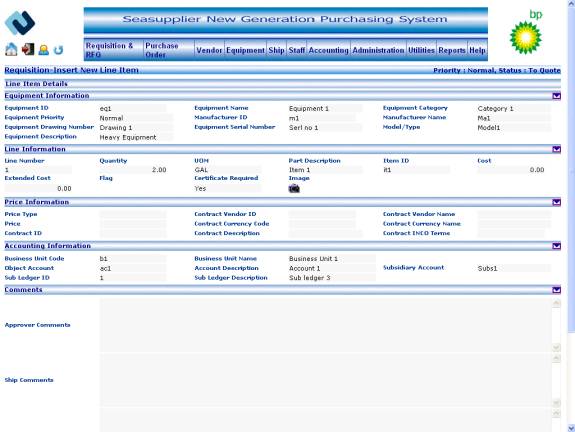
Figure Insert New Line Items-Line Item details 02
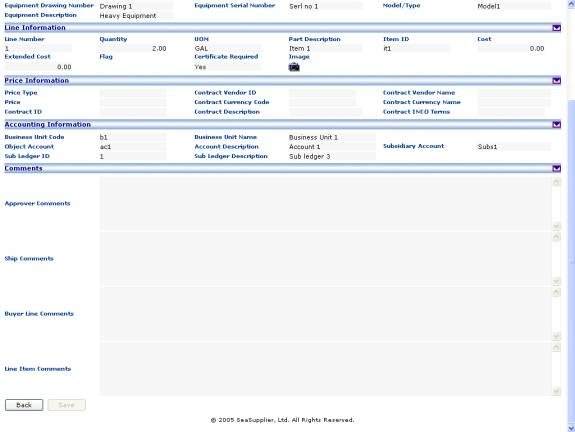
Note: You can enter information pertaining to new line items only. Line items already present in the requisition are non editable.
View and edit the following fields in Equipment Information section
Note: If equipment is selected from the equipment master, then you will find all textboxes under this section in Read-only mode.
Equipment ID label
This indicates the equipment id of equipment requisitioned. The default value will be the same as header level equipment.
Equipment Name label
This indicates the equipment name of the equipment requisitioned. The default value will be the same as header level equipment.
Equipment Category textbox
This indicates the equipment category. This is editable for manual entry equipment. The default value will be the same as header level equipment. Maximum length allowed for the field is 10.
Equipment Priority textbox
This indicates the equipment priority. This is editable for manual entry equipment. The default value will be the same as header level equipment. Maximum length allowed for the field is 10.
Manufacturer ID label
This indicates the manufacturer id. The default value will be the same as header level equipment.
Manufacturer Name textbox
This indicates the manufacturer name. This is editable for manual entry equipment. The default value will be the same as header level equipment. Maximum length allowed for the field is 30.
Equipment Drawing Number textbox
This indicates the equipment drawing number. This is editable for manual entry equipment. The default value will be the same as header level equipment. Maximum length allowed for the field is 20.
Equipment Serial Number textbox
This indicates the equipment serial number. This is editable for manual entry equipment. The default value will be the same as header level equipment. Maximum length allowed for the field is 20.
Model/Type textbox
This indicates the equipment model or type. This is editable for manual entry equipment. The default value will be the same as header level equipment. Maximum length allowed for the field is 60.
Equipment Description textbox
This indicates the equipment description. This is editable for manual entry equipment. The default value will be the same as header level equipment. Maximum length allowed for the field is 500.
To clear the Equipment Information section
Click the Clear link to clear all the text box values in the equipment information section. You can then re-enter new equipment information in this section. Clear button is available only for manual entry items.
View the following fields in Line Information section
Line Number label
This indicates the line number of the requisitioned item selected from the line items grid.
Quantity label
This indicates the quantity of the requisitioned item selected from the line items grid.
UOM label
This indicates the UOM of the requisitioned item selected from the line items grid.
Part Description label
This indicates the description of the requisitioned item selected from the line items grid.
Item ID label
This indicates the item id of the requisitioned item selected from the line items grid.
Cost label
This indicates the cost of the requisitioned item selected from the line items grid.
Extended Cost label
This indicates the extended cost of the requisitioned item selected from the line items grid.
Flag label
This indicates the flag of the requisitioned item selected from the line items grid.
Certificate Required
This indicates certificate information of the requisitioned item selected from the line items grid.
To view the image of an item
Click the Image button to view an image of the item. If available, it opens the image in a popup
View the following fields in Price Information section
Price Type label
This indicates the price type of the requisitioned item selected from the line items grid. If price has been entered manually then this will display ‘M’ else it will display blank.
Contract Vendor ID label
This is id of the contract vendor for the requisitioned item selected from the line items grid.
Contract Vendor Name label
This is contract vendor name for the requisitioned item selected from the line items grid.
Price label
This is price of the requisitioned item selected from the line items grid. If price has been entered manually then this will display the unit price entered by the user.
Contract Currency Code label
This is the contract currency code of the requisitioned item selected from the line items grid.
Contract Currency Name label
This is contract currency name of the requisitioned item selected from the line items grid.
Contract ID label
This is contract id for the requisitioned item selected from the line items grid.
Contract Name label
This is contract description for the requisitioned item selected from the line items grid.
Contract INCO Terms label
This is contract INCO terms of the requisitioned item selected from the line items grid.
View and edit the following fields in Accounting Information section
Business Unit Code textbox
This indicates the business unit code of the requisitioned item selected from the line items grid. Click the button to the right of the textbox to access the Search Business Unit popup from where you can select the relevant business unit code or enter a value in the textbox in order to change the business unit at line level. The pop up displays all the active business units attached to the ship, falling within a valid date range. Maximum length allowed for the field is 12.
Note: The account and sub ledger information is cleared on selection of a different business unit code.
Business Unit Name label
This indicates the business unit name of the requisitioned item selected from the line items grid. This gets populated with the corresponding business unit name when the user selects a business unit code in the earlier step.
Object Account Code textbox
This indicates the object account code of the requisitioned item selected from the line items grid. Click the button to the right of the textbox to access the Search Object Account popup from where you can select the relevant object account or enter a value in the textbox. The pop up displays all the active object accounts belonging to the business unit selected in the earlier step. Maximum length allowed for the field is 6.
Note: The sub ledger information is cleared on selection of a different object account code.
Account Description label
This indicates the corresponding account description for the object account chosen in the earlier step. This value gets populated at the time of selecting object account from the Search Object Account popup
Subsidiary Account textbox
This indicates the subsidiary account code. This gets populated with the corresponding subsidiary account code when the user selects an object account in the earlier step. Maximum length allowed for the field is 8.
Sub Ledger ID textbox
This indicates the sub ledger id of the requisitioned item selected from the line items grid. Click the button to the right of the textbox to access the Search Sub Ledger popup from where you can select the relevant sub ledger id or enter a value in the textbox. The pop up displays all the active records that have the same posting edit code as in object account selected in the earlier step. Maximum length allowed for the field is 9.
Sub Ledger Description label
This indicates the corresponding sub ledger name for the sub ledger id chosen in the earlier step. This value gets populated at the time of selecting sub ledger id from the Search Sub Ledger popup
View and edit the following fields in Notes and comments section
Approver Notes textarea
This textarea indicates the approver notes. Maximum length allowed for the field is 500.
Ship Comments textarea
This textarea indicates the ship comments. Maximum length allowed for the field is 500.
Buyer Line Comments textarea
This textarea indicates the buyer line comments. Maximum length allowed for the field is 500.
Line Item Comments textarea
This textarea indicates the line item comments. Maximum length allowed for the field is 500.
To go to base page
Click the Back button to go back to the base screen. The user will be taken to Insert new line items main screen.
To save the line items data
Click the Save button on the left hand bottom corner of the screen to save the line item data. The user will be taken to Insert new line items main screen.